


|
|
An enterprise
application targets a particular business
domain, usually having a GUI for multiple concurrent users and an application database for many entity types; also, it often integrates
with other applications inside or outside the organization.
エンタープライズ アプリケーションは特定のビジネス ドメインを対象としており、通常は複数の同時ユーザー用の GUI と多くのエンティティ タイプ用のアプリケーション データベースを備えています。また、組織内外の他のアプリケーションと統合されることもよくあります。
In Java, the Java EE APIs and/or the Spring framework are typically used when building such applications.
Java では、このようなアプリケーションを構築するときに、通常、Java EE API や Spring フレームワークが使用されます。
In this chapter we describe an approach to test Java enterprise applications by writing out-of-container integration tests,
where each test exercises a single step in a well-defined
business scenario (also known
as a "use case" or
"usage" scenario).
この章では、コンテナ外統合テストを記述して Java エンタープライズ アプリケーションをテストする方法について説明します。各テストでは、明確に定義されたビジネス シナリオ (「ユース ケース」または「使用」シナリオとも呼ばれます) の 1 つのステップを実行します。
With a typical layered architecture, such a test calls a public method from a component in the highest layer (normally, the
application layer), which then calls down to lower layers.
一般的な階層化アーキテクチャでは、このようなテストは最上位層 (通常はアプリケーション層) のコンポーネントからパブリック メソッドを呼び出し、そのメソッドが下位層を呼び出します。
For demonstration, we will use a Java EE version of the Spring Pet Clinic sample application.
デモンストレーションでは、Spring Pet Clinic サンプル アプリケーションの Java EE バージョンを使用します。
The full code is available in the project
repository.
完全なコードはプロジェクト リポジトリで入手できます。
The application codebase is organized in four layers: UI or presentation layer, application layer, domain layer, and infrastructure
layer.
アプリケーション コードベースは、UI またはプレゼンテーション層、アプリケーション層、ドメイン層、インフラストラクチャ層の 4 つの層で構成されています。
The application's domain model (following the approach and terminology of
Domain Driven Design) has six domain
entities: Vet (a veterinarian), Specialty (a vet's specialty), Pet, PetType,
Owner (a pet's owner), and Visit (a visit from a pet and its owner to the clinic).
アプリケーションのドメイン モデル (ドメイン駆動設計のアプローチと用語に準拠) には、Vet (獣医)、Specialty (獣医の専門分野)、Pet、PetType、Owner (ペットの飼い主)、Visit (ペットとその飼い主の診療所への訪問) の 6 つのドメイン エンティティがあります。
Besides entities, the domain model (and layer) of the application also includes domain service classes.
エンティティに加えて、アプリケーションのドメイン モデル (およびレイヤー) にはドメイン サービス クラスも含まれます。
In this simple domain, we have only one such class for each entity type (VetMaintenance, PetMaintenance, and
so on).
この単純なドメインでは、エンティティ タイプ (VetMaintenance、PetMaintenance など) ごとにこのようなクラスが 1 つだけあります。
In DDD, entities are added into and reconstituted or removed from persistent storage through "repository" components.
DDD では、エンティティは「リポジトリ」コンポーネントを通じて永続ストレージに追加され、再構成されたり、永続ストレージから削除されます。
Given that we use a sophisticated ORM API (JPA), there is only one such repository, which is not domain or application specific and
therefore goes into the infrastructure layer: the Database class.
高度な ORM API (JPA) を使用しているため、ドメインやアプリケーションに固有ではなく、インフラストラクチャ層に含まれるリポジトリは 1 つだけ、つまりデータベース クラスです。
The application uses a relational database, specifically an in-memory HSqlDb database in the sample application, so that it can be
self-contained.
アプリケーションは、自己完結型となるように、リレーショナル データベース、具体的にはサンプル アプリケーション内のメモリ内 HSqlDb データベースを使用します。
The application layer contains application service classes, which translate user input from the UI to calls into the lower layers, and
make output data available for display in the UI.
アプリケーション層には、UI からのユーザー入力を下位層への呼び出しに変換し、出力データを UI に表示できるようにするアプリケーション サービス クラスが含まれています。
This is the layer at which database transactions are demarcated.
これは、データベース トランザクションが区切られるレイヤーです。
With Java EE 7, we use JPA for the domain @Entity types, EJBs (stateless session beans) or simply
@Transactional classes for domain services, and JSF @ViewScoped beans for
the application services.
Java EE 7 では、ドメインの @Entity タイプには JPA を使用し、ドメイン サービスには EJB (ステートレス セッション Bean) または単に @Transactional クラスを使用し、アプリケーション サービスには JSF @ViewScoped Bean を使用します。
Code for the UI layer is not included in the sample, as it wouldn't be exercised by the integration test suite anyway.
UI レイヤーのコードは、統合テスト スイートでは実行されないため、サンプルには含まれていません。
(In Java EE, this layer would be comprised of JSF facelets in the form of ".xhtml" files.)
(Java EE では、このレイヤーは「.xhtml」ファイル形式の JSF フェイスレットで構成されます。)
For our first integration test class, let's consider the Vet screen, which simply displays a list of all vets with their specialties.
最初の統合テスト クラスでは、すべての獣医とその専門分野の一覧を表示するだけの Vet 画面を考えてみましょう。
public final class VetScreenTest
{
   @TestUtil VetData vetData;
   @SUT VetScreen vetScreen;

   @Test
   public void findVets() {
      // Inserts input data (instances of Vet and Specialty) into the database.
入力データ (Vet および Specialty のインスタンス) をデータベースに挿入します。

      Vet vet2 = vetData.create("Helen Leary", "radiology");
      Vet vet0 = vetData.create("James Carter");
      Vet vet1 = vetData.create("Linda Douglas", "surgery", "dentistry");
      List<Vet> vetsInOrderOfLastName = asList(vet0, vet1, vet2);

      // Exercises the code under test (VetScreen, VetMaintenance, Vet, Specialty).
テスト対象のコード (VetScreen、VetMaintenance、Vet、Specialty) を実行します。

      vetScreen.showVetList();
      List<Vet> vets = vetScreen.getVets();

      // Verifies the output is as expected.
出力が期待どおりであることを確認します。

      vets.retainAll(vetsInOrderOfLastName);
      assertEquals(vetsInOrderOfLastName, vets); // checks the contents and ordering of the list
リストの内容と順序をチェックする


      Vet vetWithSpecialties = vets.get(1); // this will be "vet1"...
これは「vet1」になります...

      assertEquals(2, vetWithSpecialties.getNrOfSpecialties()); // ...which we know has two specialties
...2つの特質があることがわかっています


      vetData.refresh(vetWithSpecialties); // ensures the Vet contains data actually in the db
Vetに実際にデータベース内のデータが含まれていることを確認します

      List<Specialty> specialtiesInOrderOfName = vetWithSpecialties.getSpecialties();
      assertEquals("dentistry", specialtiesInOrderOfName.get(0).getName()); // checks that specialties...
専門分野を確認します...

      assertEquals("surgery", specialtiesInOrderOfName.get(1).getName()); // ...are in the correct order
...正しい順序です

   }
}
The first thing to notice in the test above is that it starts at the topmost layer of the application, which is coded in Java and
therefore runs entirely in the JVM: the application layer.
上記のテストで最初に注目すべき点は、テストがアプリケーションの最上位層から開始されることです。このアプリケーションは Java でコーディングされており、したがって完全に JVM 内で実行されます (アプリケーション層)。
So, the test is not concerned with any HTTP requests and responses, or how application URLs map to components in the application layer;
such details vary with the technology used for UI implementation (JSF, JSP, Struts, GWT, Spring MVC, etc.), and are considered out of the
scope of the integration tests.
したがって、このテストでは、HTTP リクエストとレスポンス、またはアプリケーション URL がアプリケーション レイヤーのコンポーネントにどのようにマップされるかは考慮されません。このような詳細は、UI 実装に使用されるテクノロジ (JSF、JSP、Struts、GWT、Spring MVC など) によって異なり、統合テストの範囲外と見なされます。
The second thing to notice is the test code is very clean and focused on what it's trying to test.
2 番目に注目すべき点は、テスト コードが非常にクリーンで、テスト対象に重点が置かれていることです。
It's written entirely in terms of the application and its business domain, without low-level concerns such as deployment, database
configuration, or transactions.
デプロイメント、データベース構成、トランザクションなどの低レベルの懸念事項がなく、アプリケーションとそのビジネス ドメインの観点から完全に記述されています。
Finally, the third thing to notice is that no JMockit API at all appears in the test class.
最後に、3 番目に注目すべき点は、テスト クラスに JMockit API がまったく表示されないことです。
All we have is the use of the @TestUtil and @SUT annotations.
私たちが持っているのは、@TestUtil および @SUT アノテーションの使用だけです。
These are user-defined annotations, with arbitrary names chosen according to the preferences of the team.
これらはユーザー定義の注釈であり、チームの好みに応じて任意の名前が選択されます。
In our sample code, they are defined as follows.
サンプルコードでは、次のように定義されています。
@Target(ElementType.FIELD)
@Retention(RetentionPolicy.RUNTIME)
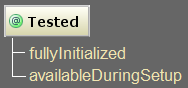
@Tested(availableDuringSetup = true, fullyInitialized = true)
public @interface TestUtil {} // a test utility object
テストユーティリティオブジェクト
@Target(ElementType.FIELD)
@Retention(RetentionPolicy.RUNTIME)
@Tested(fullyInitialized = true)
public @interface SUT {} // the System Under Test
テスト対象システム
So, here we use JMockit's @Tested annotation as a meta-annotation.
したがって、ここでは JMockit の @Tested アノテーションをメタアノテーションとして使用します。
The use of "fullyInitialized = true" causes the dependencies of a tested class to be automatically resolved through
dependency injection (specifically, constructor injection followed by field injection, as applicable).
「fullyInitialized = true」を使用すると、テスト対象クラスの依存関係が依存性注入(具体的には、該当する場合はコンストラクター注入に続いてフィールド注入)によって自動的に解決されます。
The use of "availableDuringSetup = true" merely causes the tested object to be created before any test setup
methods (@Before in JUnit or @BeforeMethod in TestNG) are executed,
contrary to the default which is to create tested objects right before each test method executes, and after any setup methods.
「availableDuringSetup = true」を使用すると、テスト対象オブジェクトは、テスト セットアップ メソッド (@JUnit では @Before、TestNG では @BeforeMethod) が実行される前に作成されるだけです。これは、各テスト メソッドが実行される直前、およびセットアップ メソッドの後にテスト対象オブジェクトを作成するというデフォルトとは対照的です。
In this first example test class, this effect is not used, so the only benefit of using "@TestUtil" is to
document the intent of the field in the test class.
この最初の例のテスト クラスでは、この効果は使用されていないため、「@TestUtil」を使用する唯一の利点は、テスト クラスでフィールドの意図を文書化できることです。
As seen in the test, VetData provides methods that create new test data needed by the test, and other utility
methods such as refresh(an entity) (which forces the persistent state of a given entity to be freshly loaded from the
database).
テストでわかるように、VetData は、テストに必要な新しいテスト データを作成するメソッドと、refresh(an entity) (特定のエンティティの永続的な状態をデータベースから新しくロードするように強制する) などのその他のユーティリティ メソッドを提供します。
As the name implies, the test suite would have one such class for each entity type, to be used in one or more test classes whenever they
need persistent instances of said types.
名前が示すように、テスト スイートにはエンティティ タイプごとに 1 つのクラスがあり、そのタイプの永続的なインスタンスが必要なときはいつでも 1 つ以上のテスト クラスで使用されます。
More details are provided in the following section.
詳細については、次のセクションで説明します。
Utility classes like VetData look like the following.
public final class VetData extends TestDatabase
{
   public Vet create(String fullName, String... specialtyNames) {
      String[] names = fullName.split(" ");

      Vet vet = new Vet();
      vet.setFirstName(names[0]);
      vet.setLastName(names[names.length - 1]);

      for (String specialtyName : specialtyNames) {
         Specialty specialty = new Specialty();
         specialty.setName(specialtyName);

         vet.getSpecialties().add(specialty);
      }

      db.save(vet);
      return vet;
   }

   // other "create" methods taking different data items, if needed
必要に応じて、異なるデータ項目を取得する他の「作成」メソッド

}
Such classes are easy to write, as they simply use the existing entity classes, plus the methods made available in a "db"
field from the TestDatabase base class.
このようなクラスは、既存のエンティティ クラスと、TestDatabase 基本クラスの "db" フィールドで使用可能になるメソッドを使用するだけなので、簡単に作成できます。
This is a test infrastructure class which can be reused for different enterprise applications, as long as they use JPA for persistence
(and JMockit for integration testing).
これは、永続性のために JPA を使用し (統合テストには JMockit を使用する) 限り、さまざまなエンタープライズ アプリケーションで再利用できるテスト インフラストラクチャ クラスです。
public class TestDatabase
{
   @PersistenceContext private EntityManager em;
   @Inject protected Database db;

   @PostConstruct
   private void beginTransactionIfNotYet() {
      EntityTransaction transaction = em.getTransaction();

      if (!transaction.isActive()) {
         transaction.begin();
      }
   }

   @PreDestroy
   private void endTransactionWithRollbackIfStillActive() {
      EntityTransaction transaction = em.getTransaction();

      if (transaction.isActive()) {
         transaction.rollback();
      }
   }

   // Other utility methods: "refresh", "findOne", "assertCreated", etc.
その他のユーティリティ メソッド: 「refresh」、「findOne」、「assertCreated」など。

}
The Database utility class (also available and used in production code) provides an easier to use API than
JPA's EntityManager, but its use is optional; tests could directly use the "em" field instead of
"db" (were it made protected, of course).
データベース ユーティリティ クラス (実稼働コードでも使用可能で使用されています) は、JPA の EntityManager よりも使いやすい API を提供しますが、その使用はオプションです。テストでは、「db」の代わりに「em」フィールドを直接使用できます (もちろん、保護されている場合)。
The EntityManager em field in the test database class gets injected with an instance automatically created according to the
META-INF/persistence.xml file that should be present in the test runtime classpath (this would go into the "src/test"
directory when using a Maven-compatible project structure; a "production" version of the file can then be provided under "src/main").
テスト データベース クラスの EntityManager em フィールドには、テスト ランタイム クラスパスに存在する META-INF/persistence.xml ファイルに従って自動的に作成されたインスタンスが挿入されます (Maven 互換のプロジェクト構造を使用する場合、これは "src/test" ディレクトリに配置されます。その後、ファイルの "production" バージョンを "src/main" の下に提供できます)。
A single default entity manager instance is created, and injected into whichever test or production classes (such as the
Database class) have a @PersistenceContext field.
単一のデフォルトのエンティティ マネージャー インスタンスが作成され、@PersistenceContext フィールドを持つテスト クラスまたは本番クラス (Database クラスなど) に挿入されます。
If multiple databases are needed, each would have a different entity manager, as configured by the optional "name" attribute
of this annotation, with the corresponding entry in the persistence.xml file.
複数のデータベースが必要な場合は、このアノテーションのオプションの「name」属性によって構成されるように、それぞれに異なるエンティティ マネージャーがあり、persistence.xml ファイル内の対応するエントリが含まれます。
Another important responsibility of this base class is to demarcate the transaction in which each test runs, ensuring that it exists
before the test begins, and that it ends with a rollback after the test is completed (either with success or failure).
この基本クラスのもう 1 つの重要な役割は、各テストが実行されるトランザクションを区別し、テストの開始前にトランザクションが存在すること、およびテストが完了した後 (成功または失敗) にロールバックで終了することを保証することです。
This works because JMockit executes the @PostConstruct and @PreDestroy
methods (from the standard javax.annotation API, also supported by the Spring framework) at the appropriate times.
これが機能するのは、JMockit が適切なタイミングで @PostConstruct メソッドと @PreDestroy メソッド (Spring フレームワークでもサポートされている標準の javax.annotation API から) を実行するためです。
Since each "test data" object is introduced to the test class in a @Tested(availableDuringSetup = true)
field, it gets "constructed" before any setup or test method, and "destroyed" after each test is finished.
各「テスト データ」オブジェクトは @Tested(availableDuringSetup = true) フィールドでテスト クラスに導入されるため、セットアップまたはテスト メソッドの前に「構築」され、各テストが終了した後に「破棄」されます。
Spring-specific annotations such as @Autowired and @Value are also
supported in fully initialized @Tested objects.
@Autowired や @Value などの Spring 固有のアノテーションも、完全に初期化された @Tested オブジェクトでサポートされます。
However, a Spring-based application can also make direct calls to BeanFactory#getBean(...) methods, on instances of various
BeanFactory implementation classes.
ただし、Spring ベースのアプリケーションでは、さまざまな BeanFactory 実装クラスのインスタンスに対して、BeanFactory#getBean(...) メソッドを直接呼び出すこともできます。
Regardless of how said bean factory instances are obtained, @Tested and
@Injectable objects can be made available as beans from the bean factory instance, by simply applying the
mockit.integration.springframework.FakeBeanFactory fake class, as shown below using JUnit.
上記の Bean ファクトリ インスタンスの取得方法に関係なく、JUnit を使用して以下に示すように、mockit.integration.springframework.FakeBeanFactory 偽クラスを適用するだけで、@Tested および @Injectable オブジェクトを Bean ファクトリ インスタンスから Bean として使用できるようになります。
public final class ExampleSpringIntegrationTest
{
   @BeforeClass
   public static void applySpringIntegration() {
      new FakeBeanFactory();
   }

   @Tested DependencyImpl dependency;
   @Tested(fullyInitialized = true) ExampleService exampleService;

   @Test
   public void exerciseApplicationCodeWhichLooksUpBeansThroughABeanFactory() {
      // In code under test:
テスト対象のコード:

      BeanFactory beanFactory = new DefaultListableBeanFactory();
      ExampleService service = (ExampleService) beanFactory.getBean("exampleService");
      Dependency dep = service.getDependency();
      ...

      assertSame(exampleService, service);
      assertSame(dependency, dep);
   }
}
With the bean factory fake applied, a tested object from a field in the test class will be automatically returned from any
getBean(String) call on any Spring bean factory instance, provided the given bean name equals the tested field name.
Bean ファクトリ フェイクを適用すると、指定された Bean 名がテスト対象のフィールド名と等しい場合、テスト クラスのフィールドからテストされたオブジェクトが、任意の Spring Bean ファクトリ インスタンスの getBean(String) 呼び出しから自動的に返されます。
Additionally, the mockit.integration.springframework.TestWebApplicationContext class can be used as a
org.springframework.web.context.ConfigurableWebApplicationContext implementation which exposes
@Tested objects from test classes.
さらに、mockit.integration.springframework.TestWebApplicationContext クラスは、テスト クラスから @Tested オブジェクトを公開する org.springframework.web.context.ConfigurableWebApplicationContext 実装として使用できます。
Some application codebases use separate Java interfaces for many of their application-specific implementation classes.
一部のアプリケーション コードベースでは、アプリケーション固有の実装クラスの多くに個別の Java インターフェイスを使用します。
These interfaces, then, are the ones used in the fields and/or parameters that receive injected dependencies.
これらのインターフェースは、注入された依存関係を受け取るフィールドやパラメーターで使用されるインターフェースです。
So, when instantiating a @Tested object having interface-based dependencies, JMockit needs to be told
about the classes implementing those interfaces.
したがって、インターフェースベースの依存関係を持つ @Tested オブジェクトをインスタンス化する場合、それらのインターフェースを実装するクラスについて JMockit に通知する必要があります。
There are two ways to do this.
これを行うには 2 つの方法があります。
In this testing approach, the goal is to have integration tests covering all of the Java code in the codebase of an enterprise
application.
このテスト アプローチでは、エンタープライズ アプリケーションのコードベース内のすべての Java コードをカバーする統合テストを実行することが目標です。
To avoid the difficulties inherent to having the code run inside a Java application server (such as Tomcat, Glassfish, or JBoss Wildfly),
these are out-of-container tests where all code (production as well as test code) runs in the same JVM instance.
Java アプリケーション サーバー (Tomcat、Glassfish、JBoss Wildfly など) 内でコードを実行することに伴う問題を回避するために、これらはコンテナー外テストであり、すべてのコード (本番コードとテスト コード) が同じ JVM インスタンスで実行されます。
The tests are written against the API of the highest-level components of the application.
テストは、アプリケーションの最高レベルのコンポーネントの API に対して記述されます。
Therefore, UI code is not exercised, as it's typically not written in the Java language, but in a technology-specific templating
language such as JSF facelets, JSPs, or something supported by the Spring framework.
したがって、UI コードは実行されません。通常、UI コードは Java 言語ではなく、JSF フェイスレット、JSP、または Spring フレームワークでサポートされているものなどのテクノロジ固有のテンプレート言語で記述されるためです。
To exercise such UI components, which in a web application also often include JavaScript code, we would need to write functional
UI tests based on HTTP requests and responses, using a testing API such as WebDriver or HtmlUnit.
このような UI コンポーネント (Web アプリケーションでは JavaScript コードも含まれることが多い) を実行するには、WebDriver や HtmlUnit などのテスト API を使用して、HTTP 要求と応答に基づく機能的な UI テストを記述する必要があります。
Such tests require an in-container approach, which brings a host of practical problems and difficulties, such as how/when to
start the application server, how to deploy/re-deploy the application code, and how to keep tests isolated from each other given that a
typical functional test often performs one or more database transactions, some or all of them usually getting committed.
このようなテストにはコンテナ内のアプローチが必要であり、アプリケーション サーバーをいつどのように起動するか、アプリケーション コードをどのようにデプロイ/再デプロイするか、一般的な機能テストでは 1 つ以上のデータベース トランザクションが実行され、その一部またはすべてがコミットされることを考えると、テストを互いに分離しておく方法など、多くの実際的な問題や困難が生じます。
In comparison, the out-of-container integration tests shown here are more fine grained, typically comprising a single transaction which
is always rolled back at the end of the test.
比較すると、ここで示すコンテナ外統合テストはよりきめ細かく、通常はテストの最後に常にロールバックされる単一のトランザクションで構成されます。
This approach allows for tests that are easier to create, faster to run (in particular, with negligible startup cost), and much less
fragile.
このアプローチにより、テストの作成が容易になり、実行速度が速くなり (特に、起動コストが無視できるほど小さくなります)、脆弱性が大幅に低減されます。
It's also easier to employ a code coverage tool and easier/faster to use a debugger, since everything runs in a single JVM instance.
すべてが単一の JVM インスタンスで実行されるため、コード カバレッジ ツールの使用も簡単になり、デバッガーの使用も簡単かつ高速になります。
The downside is that code in UI templates, as well as client-side JavaScript code, doesn't get covered by such tests.
欠点は、UI テンプレート内のコードやクライアント側の JavaScript コードがこのようなテストでカバーされないことです。